Getting Started with Git and GitHub
A guide to help you start your Development/Open-Source journey


Hey there, Thank You for reading my First Blog.
If you are into programming or the Tech-side of the World, you must have surely heard of the terms Git and GitHub. But do you know what is it and how to get started with it? Here is a guide for you.
This guide is divided in the following sections:
I. What is Git and GitHub
II. How to create an account on GitHub
III. How to download and install Git Bash
IV. How to setup Git for Windows
V. Terms related to Git and GitHub
VI. Repository:
1) How to initialize an empty repository in your system
2) How to create a repository directly in GitHub
3) Adding Files to track
4) How to Commit the change
5) How to Push the changes from your System to GitHub
6) How to Clone a repository from GitHub
7) How to Add Collaborators in your repository
8) How and Why to Fork a repository
VII. Format of Contributing to Open-Source
VIII. Bonus Content
(This guide is made assuming that the user is using Windows Operating System)
So Let's Start -
I. What is Git and GitHub
Git is a version control system. Okay, lets keep the documentation definition aside.
In simple words, Git is a tool that can track and save your changes. At any point of time, you can revert back to the change that you saved previously, even years back, if needed.
GitHub is a platform on the Internet that uses Git. You can share your code, collaborate with other developers using GitHub.
II. How to create an account on GitHub
It's pretty simple. Head over to GitHub (click on GitHub), then enter your Email and set a Password. The further steps are simple enough like other accounts that you create online.
III. How to download and install Git Bash
Just click Here and click on Download for Windows. The Git for Windows setup will start downloading. After the setup has downloaded, run it and just click on Next in every page and install Git. The default options are the best options. After the installation has completed, click on Finish and the setup will close.
IV. How to setup Git for Windows
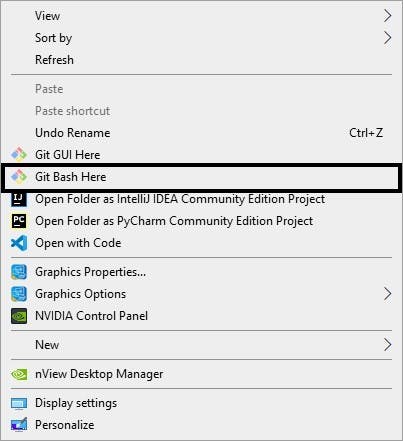
After you installed Git in your system, if you Right click inside any folder, you will see an option saying Git Bash Here, click on that option.
Here is a screenshot for reference :
The window that opens up, is known as Git Bash.
The first thing that you need to do is configure your Git Bash.
For doing that, type the following :
git config --global user.name "aditya-upadhye"
And next, type this :
git config --global user.email "xyz@gmail.com"
Replace aditya-upadhye and xyz@gmail.com with your GitHub username and GitHub email, respectively
If you have done this, then your basic Git configuration is done.
V. Terms related to Git and GitHub
1) repository
You can think of repository as a folder/directory. But this is not a normal folder. This is a folder that can be tracked by Git.
2) staging area
This is the area where your files start being tracked by Git.
3) commit
When you are confident about the changes that you made inside a git repository, you proceed with confirming (in simple words - saving) your changes. This is known as committing your changes or commit.
4) push
After you have committed your changes, you want those changes to be saved in your GitHub repository. This step is known as pushing the commit or push.
5) pull
If there is a change that is in your GitHub repository and not in your system (probably by a collaborator), you need to get that change in your system. This is known as pulling the commit or pull.
6) clone
Copying a repository files in your system is known as cloning a repository or cloning.
7) fork
This is similar to cloning. Copying a repository files in your GitHub account is known as forking a repository or forking.
VI. Repository
1) How to initialize an empty repository in your system
Create a New Folder in your desired location. Right click and open Git Bash.
Use the following command:
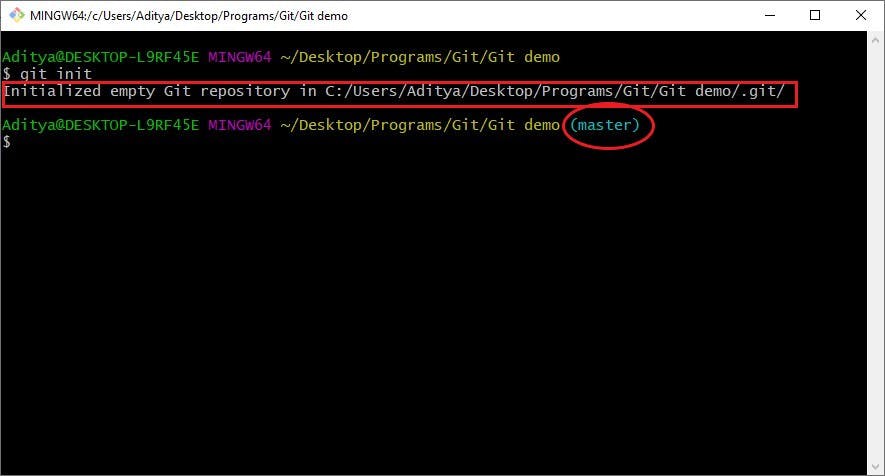
git init
You have now successfully initialized an empty repository in your system.
How to know if an empty repository has been initialized after running git init?
The below screenshot highlights the 2 ways:
2) How to create a repository directly in GitHub
Go to GitHub, on the Top Right Corner, click on your Profile Picture. A dropdown will appear. Click on Your repositories. On the right side, you will see an option in Green Color - New, click on it.
Give your repository a name and click on Create repository again in Green Color.
You have successfully created a new repository in GitHub.
3) Adding Files to track
Create or change the content in a file (can be a Python file or anything as such).
Then, in the git bash, type
git add file.py file2.py
(Here, file.py and file2.py are just names of files that you want to add to track. If you want all the files of a folder to track, use git add . )
Hit Enter.
If there is no output in the git bash, then git has started tracking your files.
4) How to Commit the change
It is a good practice to commit your change along with a commit message. This helps you to understand what changes you did at that point of time (say 3 years ago).
So, you have to type
git commit -m "<Commit Message>"
You will get response something like this:
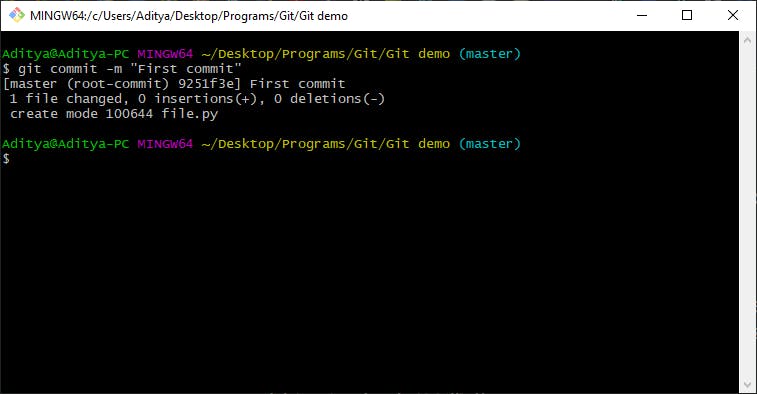 If you followed till here, you have successfully committed your changes in Git.
5) How to Push the changes from your System to GitHub
For pushing the changes from your System to GitHub, first you should have committed the changes. Then, you should create a new branch. You can give any branch name. To create, use
git branch -M main
(Here main is the branch name)
Next, you should add the URL of the origin repository where you want to push the files. To add, use
git remote add origin <origin repository URL>
Finally, you will push the change using
git push -u origin main
After you push your change, the Git Bash would look something similar to this:
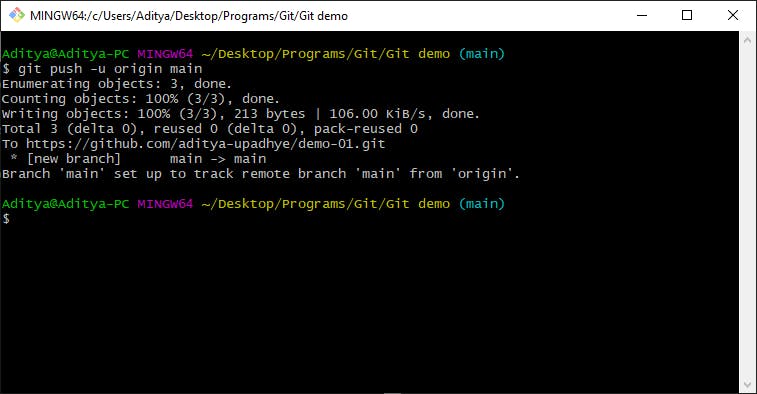
Tip: This method might seem to be complex and I, personally, do not like this way to push. The next paragraph will tell you the method I prefer.
6)How to Clone a repository from GitHub
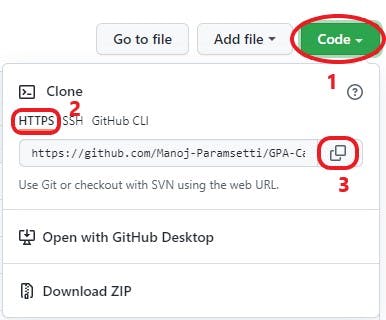
Go to the repository you want to clone. On the Right corner, click on Code which is again in Green Color. Select HTTPS and copy the link by clicking on the Clipboard like icon. Here is a screenshot which will give you some clarity about the steps:
 Now, open Git Bash in the folder where you want to clone the repository. Type
git clone <copied URL>
and hit enter.
(Replace <copied URL> by pasting the link that you have copied from the GitHub repository. Since this is Git Bash, Ctrl + V wont work here. Use Shift + Insert to paste the link in Git Bash.)
You have successfully cloned a repository from GitHub.
Tip: The easiest method that I use to create a repository and push my changes to GitHub is:
i) Create a repository directly on GitHub.
ii) Clone the repository in your local system.
iii) Make your required changes.
iv) Add files to track (using git add .)
v) Commit changes (using git commit -m "<Commit Message>")
vi) Push your changes into Git (using git push)
Next, you will get a window like this screenshot:
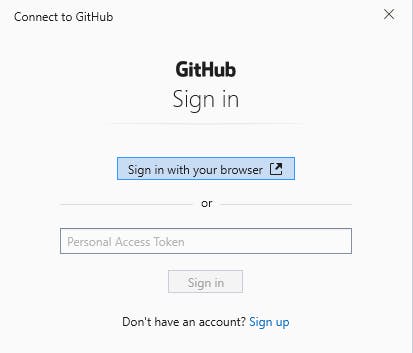
Click on Sign in with your browser. Next, Sign in to your GitHub account if prompted. Finally, you'll see a page like this:
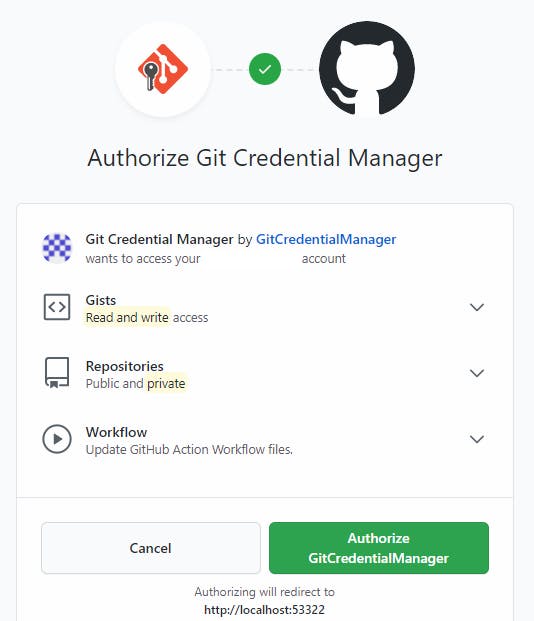 Click on Authorize GitCredentialManager. Now your changes have been pushed to GitHub. (The authorizing Git Bash process will be a one-time process only. From the next time, when you use
 git push, your changes will directly be pushed to GitHub)
7) How to Add Collaborators in your repository
Go to your GitHub profile, click on a repository created by you. Click on Settings. Then, go to Manage Access. Enter your GitHub account password if it asks for the same. Next, click on the option Add People and enter the Username of Email of the user you want to add. That's it, you have successfully added a collaborator in your repository.
8) Why and How to Fork a repository
Forking a repository will mainly have a reason that you want a copy of repository files in your repository so that you can contribute into it.
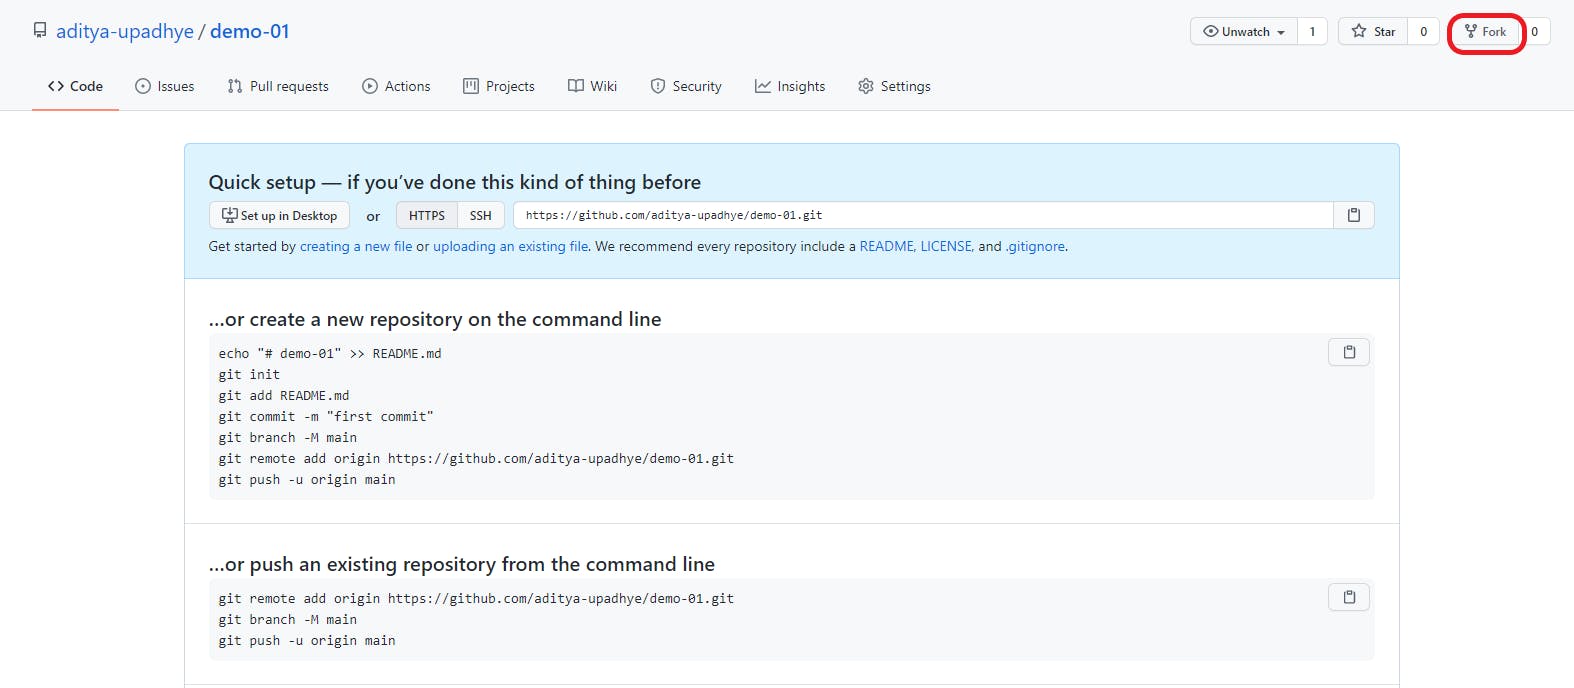
To fork a repository, go to that repository. Then on the Top Right Corner, click on Fork Option.
 Now, you will be redirected to your forked repository.
VII. Format of Contributing to Open-Source
Step 1: Fork the repository in which you want to contribute
Step 2: Clone the forked repository
Step 3: Make the necessary changes
Step 4: Push the changes into your repository
You will see something similar to the below image: Step 5: Click on Contribute
Then you will get this option:
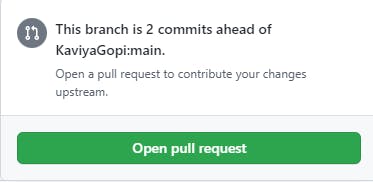
Step 6: Click on Open Pull Request
Step 7: Each Organization has a template which needs to be followed for sending a PR.
After filling, the page would look similar to this: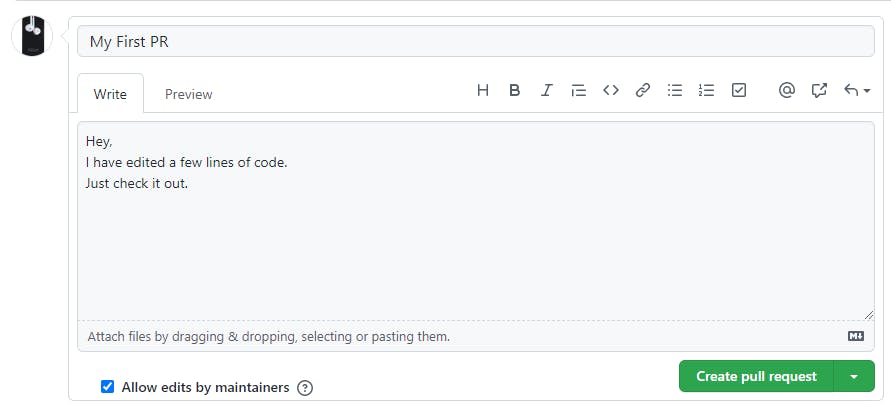 Click on Create pull request.
This is how the page will look when your Pull Request(PR) is submitted:
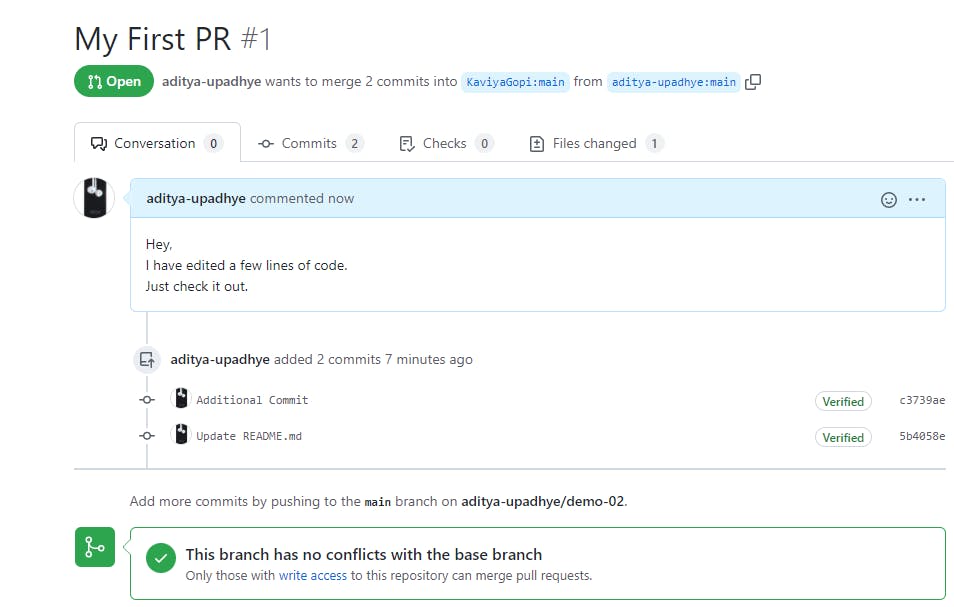
After this, the project maintainers or the supervisors will check your code and if satisfied, they will merge your pull request. Once your pull request is merged, this is how it would look like:
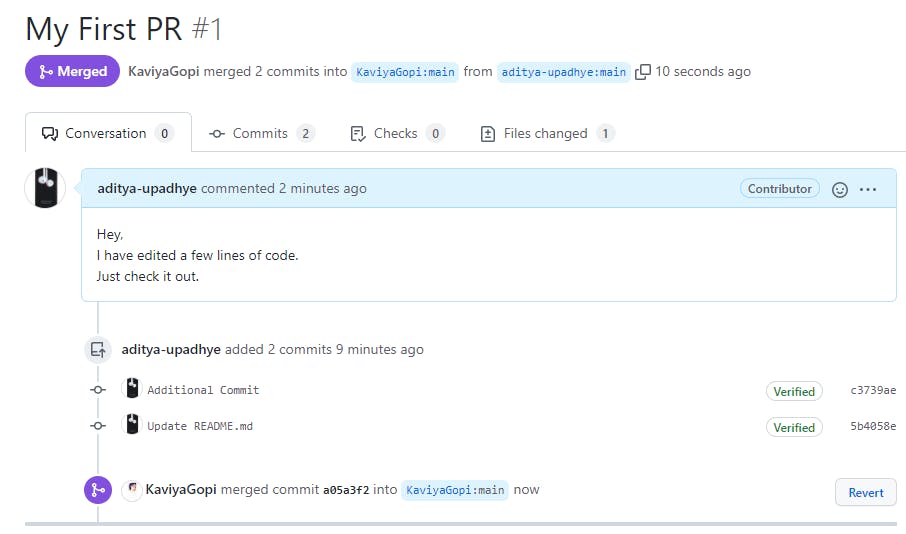
This is how Open Source Contributions work.
Is this the end of the blog?
No, it is not. Here is a Bonus Content for you:
How to connect your GitHub Account to Microsoft Visual Studio Code (VS Code)
Not all users are willing to use the Git Bash. Some prefer GUI (Graphical User Interface). You can use VS Code and work with Git and GitHub inside it, although sticking to the Git Bash or anything similar to terminal is recommended.
You can download VS Code by clicking here
After downloading, double click and install it by clicking on Next until the end.
After VS Code has installed in your system, open VS Code. A shortcut to open VS Code from terminal is
code .
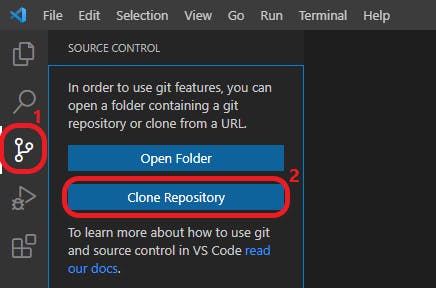
In the side bar, click on the third symbol, and then click on Clone Repository (for reference see image below)
A popup will open. Click on Clone from GitHub.

A dialogue box will appear on the screen.
Click on Allow.
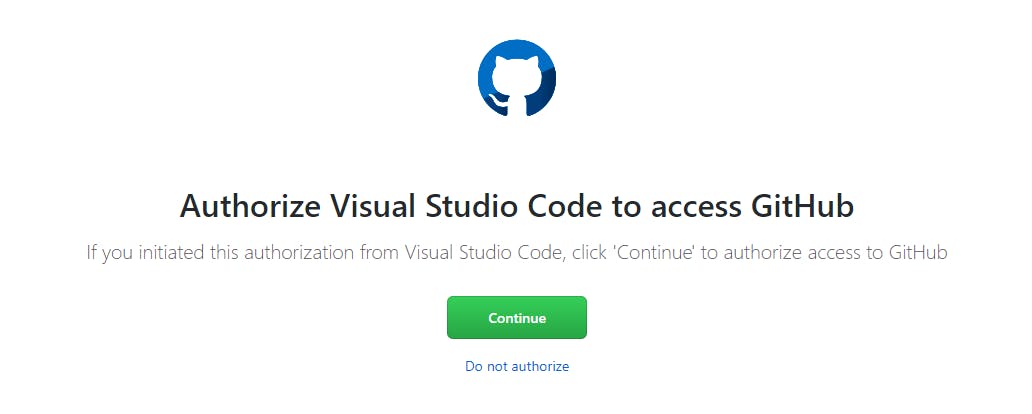
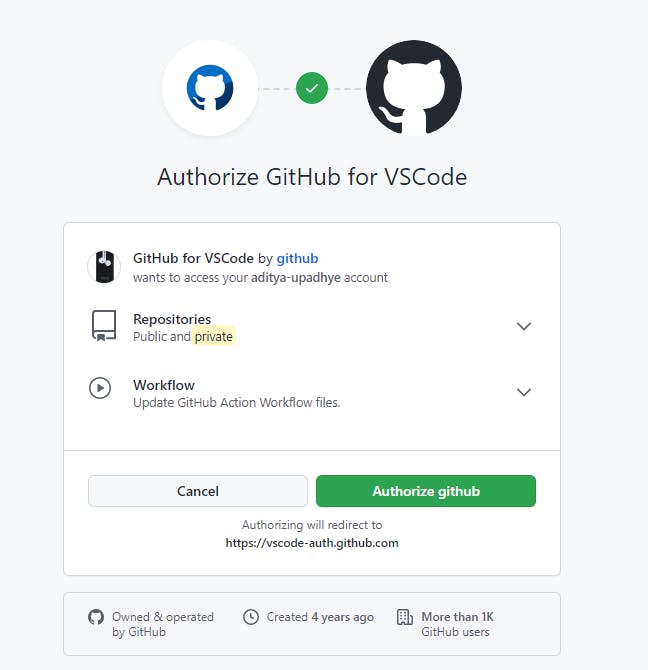
You will be redirected to your default browser where you have to click on Continue and then Authorize GitHub.
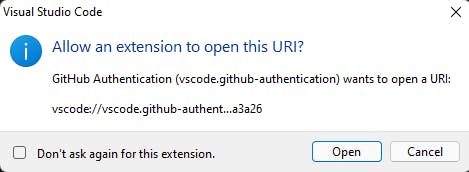
After going back to VS Code, it will ask your permission to open a link. Click on Open.
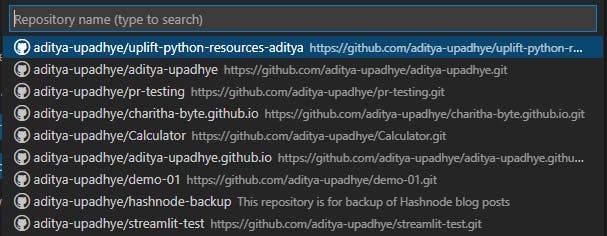
Next, the browser will prompt you to open VS Code. Click on Open Visual Studio Code. Coming back to VS Code, you will get something similar to this if you have some repositories in your GitHub account -
 Make the desired changes and save the file(s). After saving, the third option from side bar will display a number. This number is the number of files that have been changed. Git starts tracking them.
 Go to the option, then click on the plus symbol seen like this -
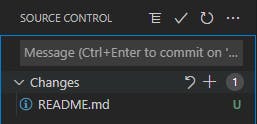 This adds your changes to the staging area.
Next, Enter your Commit message in the textbox and click on the Check mark(tick option).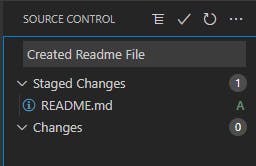 The check mark(tick option) commits your changes.
After you have done this, on the bottom left side you can see this: The Up Arrow shows that one commit needs to be pushed. Similarly, the Down Arrow shows that one commit needs to be pulled.
Click on it and your changes have successfully been pushed!!!
If you are able to follow up all this, you know the basics of Git and GitHub pretty well.
Whether this guide helped you learn something new? Feel free to comment down.
If you have any issues with any step or are not able to follow the guide, you can always reach me out on LinkedIn.
Thank you once again for reading my blog. Happy Learning!!!